Showing posts with label our home. Show all posts

Wednesday, July 18, 2012

House tour: Baby K's ocean-themed nursery

Finally, it's time to show off baby's room! It's an ocean/fishy themed room - there's not a ton of themey-type stuff, but a few accents around. Here's the view from the door.

  • The glider was purchased on Craigslist.
  • Chinese paper lanterns are from San Francisco Chinatown.
  • Bookshelf is Ikea Expedit.
  • Above the window I hung all the cards received at the baby shower.
  • The quilt hanging on the crib was made by Aunt Sam and matches the theme of the room!
The mobile I made turned out to match the wall decal perfectly!


The bookshelf holds lots of books, a piggy bank and toys.


The dresser was daddy's when he was a kid. On the left is a changing pad... and I'm cheap so I just put a pillowcase on it instead of buying covers! The drawers under that hold all of our changing supplies. The diaper cake on the right will be disassembled when we need them, but it's so cute I wanted to leave it up for a while.


On either side of the dresser I framed pages from a children's book I found at a thrift store called Across The Big Blue Sea.


The other artwork on either side of the window and by the door is pages from the book The Rainbow Fish. Aunt Victoria found this set of 3 already framed at a thrift store.


The growth chart on the door was a freebie from Babies R Us when we registered. The trash can in the middle has a wetbag from 529 Baby to hold dirty cloth diapers.


And finally, the closet...


It has great vertical storage space - that top bar is too high for me to even reach, but it will be great to hang too-small clothing as baby grows out of them.


Thanks for visiting! T minus 8 days until my due date!!

Friday, March 9, 2012

Nursery sneak peek

The nursery is now pretty much set up with the big stuff, now we just need to fill it with ALL those small items! Here's a sneak peek :)


Dresser - Daddy's since childhood
Glider chair - Craigslist
Chinese lanterns - San Francisco Chinatown
Bookshelf - Ikea Expedit


Stroller - Baby Jogger City Mini
Crib - Ikea Sundvik
Mobile - DIY (I'll blog about this once I have my real camera back and can take good pictures!)

Coming soon: Art, mattress, window treatments.

Coming later: Bedding, changing pad, laundry and diaper hampers, stuff on the shelves, tons of other baby gear.

Saturday, November 19, 2011

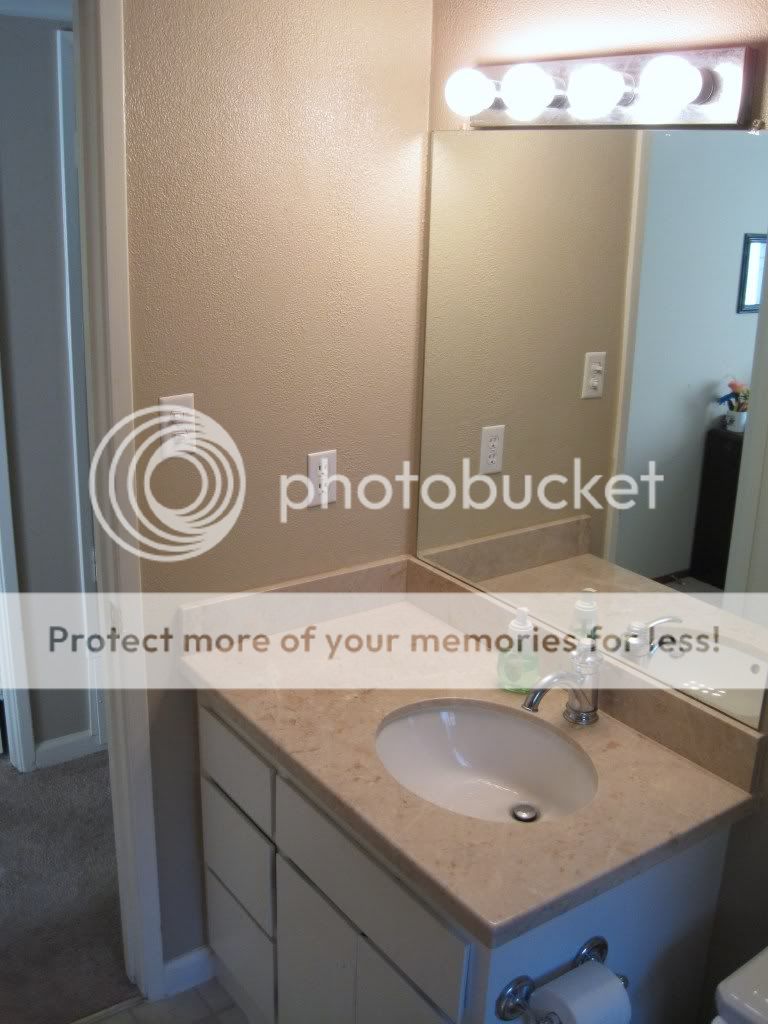
House tour: Hall bathroom

This is probably the room that's closest to being done, which is exciting. Reminder of "before" bathroom:

Photobucket
Photobucket

Since moving in, we've:
  • Replaced the nasty old cracked toilet seat that actually pinched your bootie (this alone transformed the room)
  • Added a shower curtain and rod
  • Replaced the fug laminate countertop with marble, which included a new sink and faucet too
Photobucket
Photobucket
Photobucket
Please excuse the awkward angle taken standing on the tub; it's a very small room!

We're almost done! All that we are planning to do in the near future is add cabinet hardware and replace the light fixture.

Saturday, October 29, 2011

House tour: Kitchen

Our kitchen has improved 100% in aesthetics and functionality in the past few months! As a reminder, here's the kitchen before we moved in:


And here she is today:


The changes I told you about a few months ago are coming along! So far, here's what we've done in the kitchen since moving in:
  • Added the fridge
  • Added the island
  • Installed an under cabinet wine rack and magnetic knife rack
  • Replaced the old blue horizontal blinds with bamboo roman shades
  • Installed hooks for storage by the door
  • Had granite countertop installed
  • Replaced the sink and faucet
  • Painted the walls
Here's what we plan to do next:
  • Add a backsplash
  • Replace the linoleum floor with tile
  • Replace the lighting fixtures

Thursday, October 27, 2011

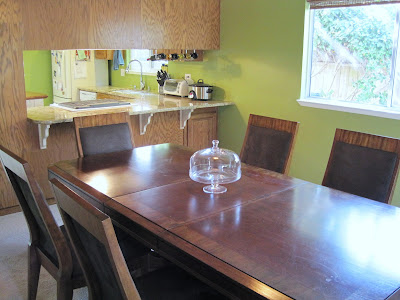
House tour: Dining room

I owe this little blog some updates. I apologize - everything comes along so slowly and I wanted to have amazing "after" pictures to share... but that clearly won't be for a while! So my goal in the near future is to give you an "in progress" house tour. Starting with the dining room. First, here's a reminder of the dining room when we bought the house:


And here it is today:


What we've done so far:
  • Painted the walls
  • Added the bamboo roman shade to the window
  • Bought a new dining set
Upcoming plans for this room:
  • Add art on the walls
  • Buy a buffet/sideboard for under the window
  • Stain the supports under the granite bar to match the cabinets
  • Add curtains for both the window and the sliding glass door
  • Replace the carpet with tile flooring
  • I want to do something to make the back of the kitchen cabinets less of an eyesore - I just don't know what!

Saturday, October 8, 2011

Family photo wall

I've wanted a collage/family photo wall for years and I'm so happy that I now have one! Check out this fabulousness:


  1. Little husband as a baby, circa 1979/80
  2. The only frame left to fill...
  3. My family at Volcano National Park in Hawaii, 2008
  4. Wedding photo, 2010
  5. James and one of his nieces
  6. James and his other niece
  7. My dad (the youngest), aunts and uncle, circa 1957
  8. Baby husband and his mom, circa 1981
  9. Another of our favorite wedding photos, 2010
  10. Baby me, circa 1988
To find the arrangement I wanted, I laid out all the frames on the floor before beginning anything. It took a few days of changing things around (Actually the idea started out being a mix of black and white photography/art and B/W family photos. Then it evolved into a combo of B/W and color family photos only).


I got this little tip from Young House Love - cut out newspaper in the sizes of the frames and tape them to the wall to help gauge where things should be positioned.


That helped to avoid putting too many holes in the wall, deciding a frame was in the wrong place, and having to make another hole. There was at least one or two of those, but instances were severely limited thanks to this handy dandy idea! Many of them I actually nailed right through the newspaper that was still on the wall, then just tore it away.

Here's what the wall looked like at first. You can see that most of the frames were empty and some were mismatched.


I thought about painting all the frames one color, but it turned out that I didn't mind the variation. I just wanted them to be a little more unified, so it was decided that they'd all be black, metallic or very dark brown.

This only required me to paint three of the lighter wood tone ones black. I just spray painted out back, over a box so I didn't get the grass. Easy peasy :)

I had the remaining photos printed by Walgreens and Shutterfly. I still have one more small one to get enlarged so it can go in frame 2. Here's how the wall looks today...


It's in the hallway between all the bedrooms and bathrooms. Here's the view from the living room...


I love how this turned out! I spent very little money on it because I'd been collecting the frames for a while - most were gifts and some were repurposed. The biggest expense was getting the larger images printed (The most expensive was image 9, around $12. Number 4 was included in our wedding photography package).

Friday, August 12, 2011

Kitchen design inspiration

Our kitchen has a lot of changes coming to it!

Original kitchen before we moved in

Phase 1 has already begun - we added a fabulous island (this one if you're interested)!


Yep, we ordered it online, sight unseen. Nothing we could find in any store was the right size, colors or price. It came in boxes and we took an evening to assemble it. It's made our kitchen so much more functional!! Not to mention pretty.

Next we will be installing a new granite countertop (currently blue laminate - stylish, no?) and sink/faucet - we hate the current ones, especially the sink! It's so not functional because the side with the garbage disposal is teeny tiny. So inconvenient for rinsing dishes.


We've also replaced those blue blinds with bamboo roman shades (Purchased from Lowes, where they'll custom cut the width for you for free).


Once the counter is replaced, we'll be painting and getting new light fixtures as Phase 2.

And sometime after that, Phase 3 will entail a new tile floor (through to the dining room too, which currently has carpet) and a backsplash.

Here's a big picture look at the overall design of the room. It was really helpful to me in seeing how it will all come together and making sure that the materials complement each other! (Click the image to see it larger)

  1. Cabinet color (I can see someday painting the cabinets white, but that's not a priority any time soon)
  2. Faucet we're planning to order (Well actually we're not completely decided but we like this one and this one)
  3. Our range - all appliances are white
  4. The island we added
  5. The granite counter we've selected - "Persa Antique"
  6. The tile on the floor will be similar to this color and "hopscotch" pattern
  7. Paint color will be something like this green - the specific shade hasn't been narrowed down yet

Sunday, July 31, 2011

Empty house tour - bedrooms & bathrooms

I already showed you the outdoor areas and common areas - the last part of the house you haven't seen is the bedrooms and bathrooms.

Bedroom #1: Master (not much to see when empty - all the bedrooms look the same!)


Master bathroom


Hall bathroom


Bedroom #2: Office


Bedroom #3: Guest room


Bedroom #4: Extra (future nursery :)